Tile thickness typically ranges from 1/4 inch to 3/4 inch, while mortar adds approximately 1/8 inch to 3/8 inch. Understanding the combined thickness of tile and mortar is crucial for planning installation height transitions.
Flooring and wall coverings have evolved significantly, with tiles becoming a prominent choice for their durability and aesthetic flexibility. As a homeowner or contractor about to embark on a tiling project, recognizing the total thickness of your materials is essential for a seamless finish.
This knowledge assists in determining the right amount and type of materials needed, estimating costs, and ensuring alignment with adjacent surfaces.
Proper measurement before beginning your tiling endeavor ensures compatibility with fixtures, appliances, and door clearances, creating a professionally executed appearance upon completion.
Tile And Mortar Basics
When setting tiles, two main elements come into play: the tiles themselves and the mortar. Together, they form a crucial duo in flooring and wall installations.
The thickness of tile and mortar varies based on application, use, and type. Understanding these basics helps in choosing the right materials for any project.
Key Components Of Tiling
Tiling comprises several elements, each serving a specific purpose.
- Tiles: Manufactured in various materials, such as ceramic, porcelain, or stone.
- Mortar: A blend of cement, sand, and water, acting as an adhesive.
- Grout: Fills and seals the gaps between the tiles.
- Underlayment: A stable base for the tiles, often made of cement board.
The thickness of tiles typically ranges from 1/4 inch to 3/4 inch. Mortar thickness can vary, usually around 3/16 inch when applied with a notched trowel.
Role Of Mortar In Tiling
Mortar is more than just tile glue. It forms a bed that secures the tile in place and compensates for minor imperfections in the substrate.
It also determines how level and strong the finished surface will be. The proper application of mortar is critical for a successful tile installation.
| Mortar Type | Typical Use | Applied Thickness |
| Thin-set | Floor & Wall Tiles | 3/16 inch |
| Medium-set | Larger Tiles | Up to 1/2 inch |
| Thick-bed | Heavy Duty Applications | Over 1/2 inch |
The choice of mortar thickness often depends on the tile size and the surface it’s being applied to.
Tile Thickness Varieties
Choosing the right tile thickness is essential for both design and functionality. Tile thickness affects installation, durability, and aesthetic appeal.
This section covers the variety of thicknesses available in the tile market and helps identify which might be the perfect selection for various applications.
Standard Tile Sizes
Tiles come in an array of standard thicknesses. It’s critical to select the appropriate size for your project. Here’s a quick outline:
- Floor Tiles: Typically range from 8mm to 10mm.
- Wall Tiles: Usually a bit thinner, going from 6mm to 8mm.
- Larger Format Tiles: Can be up to 12mm thick.
For specific projects, such as outdoor tiles or ones requiring heavy load-bearing capabilities, refer to supplier specifications for optimal thicknesses.
Thin Tiles Vs. Thick Tiles: Pros And Cons
The debate between thin and thick tiles is rooted in both practical and aesthetic concerns. Here’s a comparison:
| Tile Type | Pros | Cons |
| Thin Tiles | LightweightEasier to cut and installSuitable for walls | Less durableRequires an extremely flat surface |
| Thick Tiles | More durableBetter for high-traffic areasCan support more weight | Heavier, harder to work withMore challenging to cutCan be more expensive |
Understanding these pros and cons assists in making an informed decision for tile selection based on the specific requirements of the area of installation — whether it’s a busy kitchen floor or a decorative bathroom wall.
Mortar Types And Depths
The success of a tiling project often rests on the unseen hero: the mortar. Understanding mortar types and their corresponding depths is crucial for a sturdy and long-lasting tile installation. Choices abound and vary by application, requiring a careful selection process.
Choosing The Right Mortar
Selecting the correct mortar type is essential for your tiling job. General options include:
- Thin-set mortar: Ideal for flooring and wall tiles, providing a strong bond.
- Epoxy mortar: Best for areas that require chemical resistance. Adheres well in wet environments.
- Mastic: A premixed option great for wall tiles in dry spots.
Consider the tile’s weight, location, and exposure to elements before making a decision.
Average Mortar Depths For Different Applications
The thickness of mortar surely depends on the application at hand:
| Application | Average Depth |
| Standard floor tiling | 3/16″ – 1/4″ |
| Wall tiling | 1/8″ – 3/16″ |
| Large format tiles | >1/4″ |
| Natural stone tiles | 1/4″ – 1/2″ |
These depths ensure a solid grip and can accommodate slight surface imperfections before setting tiles in place.
Calculating Total Depth
Ever tiled a floor and wondered how thick the entire setup would be? Knowing the total depth helps plan transitions and appliance fittings.
It involves measuring the tile, mortar, and any substrates used. This section will guide you through each step to determine the full depth of your tile installation.
Combining Tile And Mortar Measurements
To get started, add the thickness of the tile to the mortar layer’s thickness. Tiles vary in thickness, typically ranging from 1/4 inch to 3/4 inch.
Mortar, used as an adhesive, adds another layer. A standard mortar layer is roughly 3/16 inch. Check your product specifications for precise figures.
Here’s a simple equation:
Tile Thickness + Mortar Thickness = Total Depth
For example, if you have a tile that’s 3/8 inch thick and you use a 3/16 inch thick layer of mortar, the total depth will be 9/16 inch.
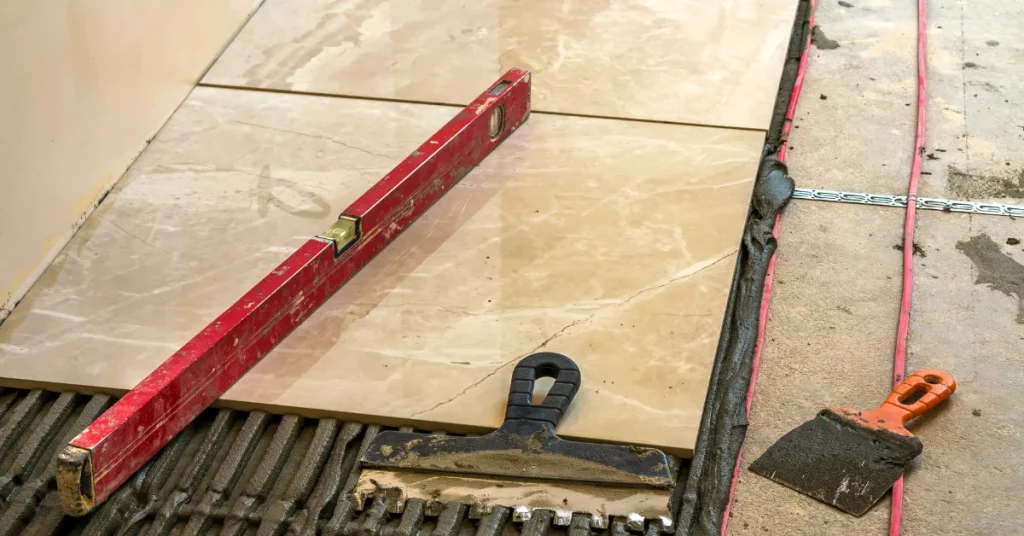
Tools For Precise Depth Estimation
Accurate measurements are crucial for a faultless finish. Use these tools:
- Tile Caliper: Measures tile thickness
- Depth Gauge: Determines mortar thickness
- Straight Edge: Confirms evenness across tiles
It is best to measure multiple tiles and the mortar at several points to ensure consistency. Keep notes of your measurements to refer back to during your project.
Installation Impact On Depth
The installation impact on depth cannot be overemphasized. As anyone delves into the realms of tile and mortar, depth variation creeps in. It is essential to understand the components.
Tiles vary in thickness, and mortar adds to that depth. However, installation techniques can tweak this thickness significantly.
Impact Of Installation Techniques
Every tiler knows that installation techniques play a huge role. They set the final depth of the tile and mortar. Some tilers go for a thin-set method.
This method uses less mortar. It makes the floor not too high. Others may use a medium-bed approach. This approach needs more mortar. Thus, the floor height increases.
Factors like the surface’s evenness affect mortar thickness. Surfaces that are not even need more mortar.
- Back-buttering tiles: Adds extra mortar, hence more depth.
- Using leveling systems: Might decrease the need for extra mortar.
Adjusting Depths For Special Tiling Projects
Special tiling projects call for unique depth considerations. Tiling a bathroom differs from tiling a kitchen backsplash. Measure and align the project’s needs. Custom cuts and trim might be necessary.
| Project Type | Recommended Depth |
| Bathroom Floors | Thicker to support moisture conditions |
| Kitchen Backsplash | Thinner for aesthetic appeal |
For heated flooring systems, depth adjustments are critical. Ensure the tile and mortar envelope the system fully. This step is essential for optimal performance.
Whichever the project, a key to success is aligning tile and mortar depth. Understanding installation impact on depth shapes the groundwork for durable tiling.
Maintaining Optimal Depths
Getting the right thickness for tile and mortar is crucial. Ideal depths ensure tiles are well supported and last long. Understanding the essence of maintaining optimal depths is a key step in tile installation.
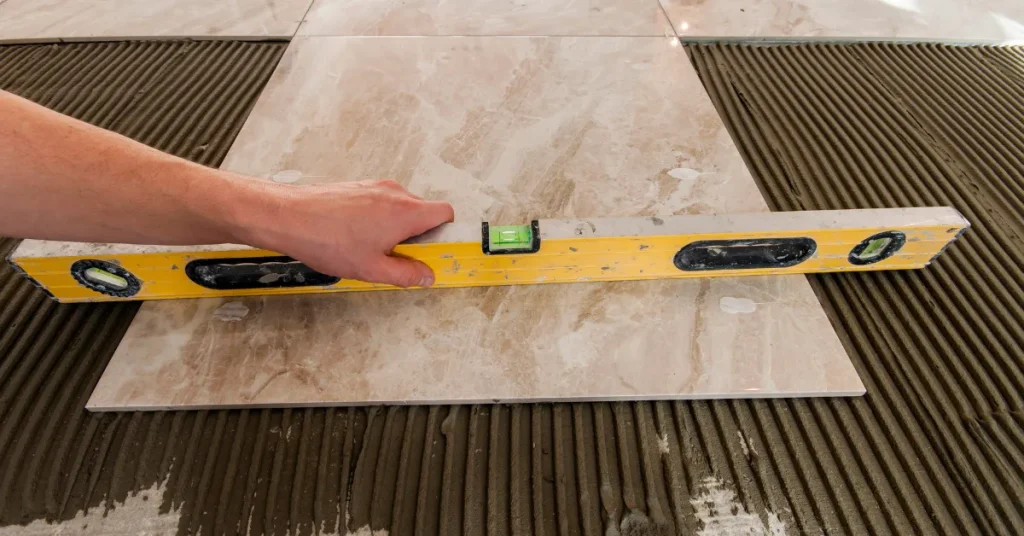
Tips For Even Application
Even tile and mortar application prevents future problems. Follow these guidelines for best results:
- Use the right trowel: Choose a trowel with the correct notch size for your tiles.
- Apply even pressure: This ensures consistent mortar thickness.
- Back-butter larger tiles: Spread mortar on tile backs to improve adhesion.
- Check thickness regularly: Use spacers and a level to maintain even depth.
Common Mistakes To Avoid
Prevent tile installation errors with these tips:
- Don’t rush: Take time to prepare surfaces and lay tiles properly.
- Avoid excess mortar: Too much mortar leads to uneven surfaces.
- Skip dry fitting: Always dry lay tiles before installation to avoid mishaps.
Frequently Asked Questions For How Thick Is Tile And Mortar
How Thick Is Tile And Mortar Together?
Tile and mortar thickness combined typically ranges from about 3/8 inch to 1/2 inch, but this can vary based on the type of tile and mortar used.
What Is The Average Thickness Of Tile?
The average thickness of tile ranges from approximately 1/4 inch (6mm) to 1/2 inch (12mm). Ceramic tiles tend to be on the thinner side, while porcelain tiles are often thicker.
How Thick Are Tiles When Laid?
Tiles typically range from 1/4 inch to 3/4 inch in thickness when laid. This varies based on material and intended use.
How Thick Are Tiles With Cement?
Tiles with cement typically have a total thickness ranging from 3/4 inch to 1 1/2 inches. This includes the tile itself and the cement layer.
Conclusion
Understanding the thickness of tile and mortar is crucial for any tiling project, ensuring both durability and aesthetic appeal. We’ve explored various factors that influence this measurement.
Remember, precision matters for a successful installation. Keep these tips in mind to achieve the perfect finish for your space.
Resources:
1. https://basc.pnnl.gov/resource-guides/clay-or-concrete-tile-roofs