Floor tiles typically range from 1/4 inch to 3/4 inch in thickness. Standard ceramic tiles are often 1/4 to 3/8 inch thick.
Selecting the right floor tile thickness is essential for any home renovation or construction project. The thickness of floor tile is a key factor that affects durability, ease of installation, and compatibility with existing surfaces.
Thicker tiles are usually more durable and resistant to heavy foot traffic, making them ideal for floors in high-traffic areas such as kitchens and hallways.
Tile thickness also plays a significant role in ensuring a level transition between different flooring materials.
For homeowners and contractors alike, understanding these differences is crucial to make informed decisions about the types of tiles that will best suit their specific needs.
Regardless of the chosen thickness, proper installation and maintenance are vital for the longevity of your tile flooring.

Tile Thickness: Why It Matters
Choosing the right floor tile thickness is as important as picking the perfect color and pattern. This crucial measurement influences a tile’s durability and ease of installation.
It ensures your floor can handle the daily grind. Let’s explore the depth of this topic.
Impact On Durability
Floor tiles come in various thicknesses which directly affect their strength. Thicker tiles typically offer more resistance against cracks and wear. They are suitable for high-traffic areas.
- Residential spaces often use tiles ranging from 6mm to 10mm.
- Commercial locations benefit from tiles that are 10mm to 12mm thick.
Denser tiles equal longer-lasting floors.
Influence On Installation
The thickness of a tile not only contributes to its longevity but also affects installation. Thicker tiles need more adhesive and can be harder to cut and align. Professional installers must ensure subflooring is level for proper support.
| Tile Thickness | Required Adhesive | Installation Difficulty |
| 6mm | Less adhesive | Easier to handle |
| 10mm | Moderate adhesive | Moderate difficulty |
| 12mm+ | More adhesive | Increased difficulty |
Thinner tiles might be easier to cut and work with, making them a good choice for DIY projects.
Common Thicknesses Of Floor Tiles
When selecting floor tiles, thickness plays a major role. Thick tiles are durable and long-lasting. Thin tiles work best for walls and light traffic areas.
Knowing common thicknesses ensures the right choice for your flooring project. Let’s delve into the typical dimensions for two popular types of floor tiles: ceramic and porcelain.
Ceramic Tile Dimensions
Ceramic tiles are a top pick for many homeowners.
- Standard thickness is about 1/4 inch (6mm).
- Thicker options can go up to 3/8 inch (10mm).
- Mostly used in residential areas, due to their moderate foot traffic endurance.
Here’s a quick look at the common sizes:
| Tile Size (Inches) | Thickness (Inches) |
| 4×4 | 1/4 |
| 12×12 | 1/4 to 3/8 |
| 18×18 | 3/8 |
Porcelain Tile Variations
Porcelain tiles, known for their strength, come in varied thicknesses.
- Flooring porcelain tiles usually range from 1/4 to 3/4 inch (6mm to 19mm).
- Heavier traffic areas call for thicker tiles.
- Options like thin porcelain slabs are also emerging, ideal for walls.
The table below illustrates common porcelain tile sizes and their thicknesses:
| Tile Size (Inches) | Thickness (Inches) |
| 12×24 | 1/4 to 1/2 |
| 24×24 | 1/4 to 3/4 |
| 6×36 | 3/8 |
Factors Affecting Tile Thickness
When selecting floor tiles, thickness plays a key role. It influences durability, feel, and overall aesthetic. Several factors determine the ideal thickness of a tile. Understanding these can lead to informed choices for various settings.
Material Composition
Material composition significantly impacts a tile’s thickness. Different materials possess unique densities and structural properties. Below, explore how common tile materials vary in thickness.
- Ceramic: Lightweight with a standard thickness ranging from 6.5mm to 10mm.
- Porcelain: Denser than ceramic, often between 8mm and 10mm.
- Natural stone: Varies widely but typically between 10mm and 20mm.
- Glass: Thin and translucent, often around 4mm to 8mm.
Intended Use And Application
Different settings demand specific tile attributes. Here’s how intended use and application influence tile thickness.
- Residential or Light Use: Thinner tiles, around 8mm, suffice for areas with less foot traffic.
- Commercial or High Traffic: Thicker tiles, up to 12mm, are essential for durability.
- Outdoor Use: Weather resistance calls for thicker tiles, sometimes over 20mm.
Selection should also consider the substrate’s smoothness and the need for level transitions between different flooring types.
Measuring Tile Thickness Correctly
Choosing the right floor tile involves more than picking a style. Knowing the tile’s thickness is crucial for installation.
This factor affects everything from the feel underfoot to the transition between rooms. Let’s dive into how to measure tile thickness correctly.
Tools For Accurate Measurement
Gather the right tools to ensure your measurements are precise:
- Caliper: Offers the most accurate readings for tile thickness.
- Ruler: A basic option when a caliper isn’t available.
- Tape measure: Useful for larger tiles and quick checks.
Step-by-step Measurement Guide
Follow these steps to measure tile thickness:
- Place the tile on a flat surface.
- If using a caliper, zero out the device first for accuracy.
- Open the caliper’s jaws and place them on either side of the tile.
- Close the jaws gently until they touch the tile’s top and bottom.
- Read the measurement displayed.
- For a ruler or tape measure, align the edge along the side of the tile.
- Take the measurement from the bottom to the top edge.
Repeat the process several times to confirm consistency. For tiles already installed, measure from the surface to the subfloor if possible.
Choosing The Right Thickness For Your Project
When embarking on a new flooring project, getting the tile thickness right is vital.
The right thickness ensures durability, ease of installation, and seamless integration with existing floor systems.
Making the correct choice sets the stage for a floor that’s not just beautiful but also functional and long-lasting.
Assessing The Subfloor Requirements
The subfloor plays a crucial role in tile installation.
A solid and level subfloor is essential for a successful tile placement.
Here’s how to assess its requirements:
- Check the subfloor for flatness and clean any debris.
- Ensure the subfloor can support the tile’s weight.
- Measure moisture levels; too much moisture can cause problems.
Different subfloors might need different tile thicknesses.
For instance, concrete subfloors are versatile and can accommodate most tile thicknesses.
Wood subfloors, however, may require thicker tiles for added strength.
Tile Thickness Compatibility With Floor Systems
Integrating new tiles with existing floor systems demands careful consideration.
Compatibility is key to a cohesive look and functional space. Below are points to guide you:
| Existing Floor System | Recommended Tile Thickness |
| Underfloor Heating | Thinner tiles for better heat conduction |
| High Traffic Areas | Thicker tiles for durability |
| Transitional Areas | Tiles matching the height of adjoining floors |
Consider the transition to other flooring types.
The thickness of the tile should allow for a smooth transition.
Also, remember door opening heights and the space needed beneath them.
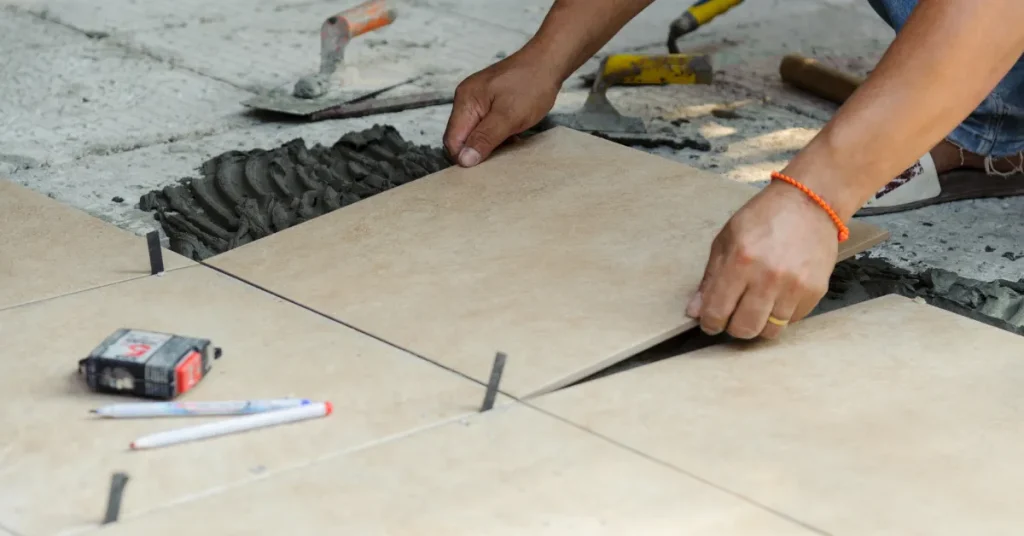
Installation Tips For Various Tile Thicknesses

Installing floor tile can transform any room, but the key to a flawless finish lies in
understanding how to handle different tile thicknesses.
Each tile size requires a unique approach to installation, ensuring tiles are level and well-adhered. This guide dives into expert tips for dealing with various tile thicknesses, ensuring your new floor is as beautiful as it is durable.
Adhesive Selection For Proper Bonding
The right adhesive is critical for a strong tile bond. For thin tiles, a thin-set mortar works well, while thicker tiles might need a medium-bed mortar to support their weight. Always check the tile’s specifications.
- Thin Tiles (up to 6mm): Use multipurpose thin-set mortar.
- Standard Tiles (6mm-12mm): Standard thin-set mortar suffices.
- Thick Tiles (12mm and above): Choose a medium-bed or thick-set mortar.
Leveling Techniques For A Smooth Finish
A level tile floor prevents cracks and tripping hazards. Use leveling spacers for consistency. Ensure all subflooring is even before starting.
For thicker tiles, consider a self-leveling underlayment to manage height differences. Always measure tile thickness and room dimensions to calculate the correct mortar layer and establish a level surface.
| Tile Thickness | Leveling Technique |
| Thin Tiles | Use leveling clips and wedges. |
| Standard Tiles | Check subfloor levelness with a straight edge. |
| Thick Tiles | Apply a self-leveling underlayment if needed. |
FAQs About How Thick Is Floor Tile
How Thick Is Floor Tile And Thinset?
Floor tiles typically range from 1/4 inch to 3/4 inch in thickness. Thinset adhesive is about 3/16 inch thick when applied.
How Thick Should A Floor Tile Bed Be?
A floor tile bed, commonly known as mortar bed or underlayment, should typically be approximately 3/4″ to 1″ thick after being firmly pressed down.
How Thick Is A Tile Base?
Tile base thickness typically ranges from 1/4 inch (6mm) to 1/2 inch (12mm). It depends on the material and application requirements.
How Thick Is A Cement Floor Tile?
Cement floor tiles typically range from 16 mm to 20 mm in thickness. This varies based on the manufacturer and the intended use of the tile.
Conclusion
Understanding the thickness of your floor tile is key to a successful installation. Different projects require varied specifications, so choose accordingly.
Remember, the right thickness ensures durability and aesthetic coherence. For further insights on tile dimensions, explore our comprehensive guides and make informed decisions for your flooring needs.
Resources:
1. https://www.access-board.gov/ada/guides/chapter-3-floor-and-ground-surfaces/